How to Record Ukulele?
December 28, 2020
How to Record Harmonica
January 21, 2021How to Record Flute?
To record a flute can be very difficult. But I’ve found some very useful tips and tricks to help you along the way.
In this article I’ll walk you through:
– how to record the flute
– what microphones to use to record the flute
– and how best practises when it comes to performance and mix
Recording a flute, like practising an instrument, gets better with repetition.
It’s a cold hard fact. But that doesn’t mean that you should be thrown to the wolves and left to fend for yourself – metaphorically speaking, of course.
We are here to help.
How to record a flute?
First things first, recording a woodwind instrument is notoriously difficult.
You have to deal with everything from high-pitch sounds, to infuriating misplaced breaths.
But that doesn’t mean it has to stay difficult. In fact, I’ve decided to destroy this myth and look at the three best ways to record your flute.
- Using a condenser mic at an appropriate distance
- Using a dynamic mic at an appropriate distance
- Using a ribbon mic on the flute at an appropriate distance
Which mic is best for flute recording?
You have a few options to mic a flute, and a few mics stand out as the best.
The first is a condenser mic, which is great for capturing the full range of sound from the flute.
It also has excellent sensitivity and can capture subtle nuances in the playing.
Another good option is a ribbon mic, which offers more warmth and a more natural sound than other types of mics.
Finally, dynamic mics are also excellent for recording the flute as they balance clarity and warmth.
Ultimately, choosing the right mic depends on your preferences and budget, but any of these three types should provide excellent results when recording your flute.
How do you record a flute using a condenser mic?
Just like the actual playing of the instrument, the recording of a flute will become easier the more you do it.
And the better your recordings will become in turn.
To use a condenser mic, follows this simple step-by-step walkthrough:
⦁ Collect a condenser microphone, a microphone stand, a recording device, and a cable to transfer the sound from the microphone to the recording device (usually a XLR cable).
⦁ Place the microphone stand between 5-10cm from your instrument (when playing).
⦁ Connect the XLR cable (or cable of choice) on one end, to the microphone, and on the other end, to the recording device.
⦁ Check the input from the microphone is being registered on the recording device – this may not appear until the gain is increased on your recorder
⦁ Record!
⦁ Listen back and record again. Practice makes perfect!
⦁ Move your microphone placement to different distances and/or angles to see what sounds best.
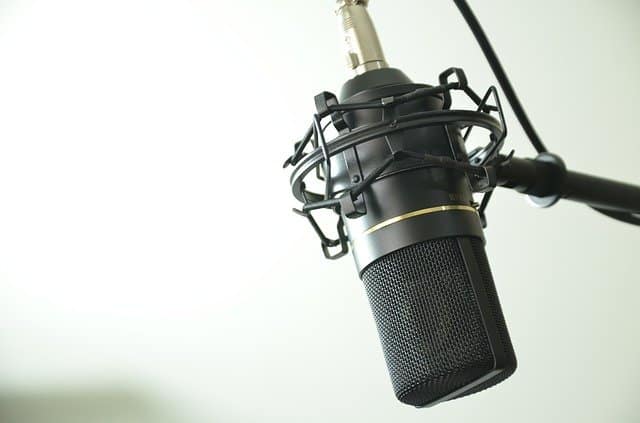
A condenser mic is designed to pick up any and all sounds in the environment; therefore, be careful that your breaths are not being picked up unintentionally on your recording.
A condenser mic will generally capture more overtones for a flute, giving you a brighter sound in your audio recording.
How do you record a flute using a dynamic mic?
A dynamic microphone is not worlds apart from that of a condenser mic.
In fact, the specific difference between them is that a dynamic mic has a voice coil and magnet to pick up and convert sound waves into an electrical signal.
In contrast, a condenser mic uses an electronically charged diaphragm, which is caused to vibrate by soundwaves.
In simple terms, a condenser mic is powered by an outside source (electricity, not batteries) to be constantly searching for sound, and reacting to sound waves.
The dynamic mic does not have this outside power source and only reacts with soundwaves that reach it – creating a less ‘bright’ sounding audio recording.
To record a flute using a dynamic mic, follow these easy-to-understand steps:
⦁ Collect a dynamic microphone, a microphone stand, a recording device, and a cable to transfer the sound from the microphone to the recording device (usually a XLR cable).
⦁ Place the microphone stand between 5-10cm from your instrument (when playing).
⦁ Connect the XLR cable (or cable of choice) on one end, to the microphone, and on the other end, to the recording device.
⦁ Check the input from the microphone is being registered on the recording device – this may not appear until the gain is increased on your recorder
⦁ Record!
⦁ Listen back and record again. Practice makes perfect!
⦁ Move your microphone placement to different distances and/or angles to see what sounds best.
How do you record a flute using a ribbon mic?
Ribbon mics are the best designed mic for capturing instrumental sounds.
Although they lost popularity in the 1970s with the advent of better condenser microphones, the ribbon’s figure-of-8 polar pattern hears more like human ears.
The mic’s design gives your recording a low-end sensitivity and high-frequency roll-off. Ribbons are effectively the warmest, most natural sound microphone on the market.
To record a flute using a ribbon mic, we’ve compiled an easy-to-follow flowchart below:
⦁ Collect a ribbon microphone, a microphone stand, a recording device, and a cable to transfer the sound from the microphone to the recording device (usually a XLR cable).
⦁ Place the microphone stand between 5-10cm from your instrument (when playing).
⦁ Connect the XLR cable (or cable of choice) on one end, to the microphone, and on the other end, to the recording device.
⦁ Check the input from the microphone is being registered on the recording device – this may not appear until the gain is increased on your recorder
⦁ Record!
⦁ Listen back and record again. Practice makes perfect!
⦁ Remember ribbon mics pick up sound from the front and back – that means you should consider what is behind the mic. Continually reposition your microphone at different locations, angles and distances to find what works best for you recording purposes.
Pro tip: Ribbon mics are very sensitive to the proximity effect. This means, if you are closer to the mic than normal, your thin sounding flute can be beefed up and made to sound much warmer. This is an easy trick to give your sound some more bass.
Is SM57 good for the flute?
The Shure SM57 is a popular microphone and is considered one of the best microphones for a flute player.
It is an excellent choice for the flute, as it has a wide frequency response and can handle high sound pressure levels.
It can record very natural flute sound.
The SM57 has a cardioid polar pattern which helps to reject off-axis sounds, making it ideal for recording in noisy environments.
Additionally, its rugged construction makes it very durable, so you don’t have to worry about breaking or being damaged easily.
Overall, the SM57 is an excellent choice for recording the flute and will provide you with clear and accurate recordings.
How to mic flute for Live Performance
When it comes to micing a flute for live performance and getting an excellent flute sound, the best option is to use a Shure mic.
These mics are perfect for capturing the delicate sound of the flute and provide an airy quality that is essential for any flutist.
The right mic technique is important to get the best sound out of your instrument.
For this purpose, you can use either a dynamic or a condenser mic.
Although condenser mics are more expensive, they offer much better sound quality than dynamic mics.
To set up your mic correctly, place it close to the left hand of the flutist and off-axis from the mouthpiece.
This will ensure that you capture all the nuances of playing the flute without interference from other instruments on stage.
With this setup, you’ll be able to get a clear and balanced sound that will bring out all of the details in your performance.
How to record flute on phone
The first, and easiest way to record a flute is to use the built-in microphone of a device.
Android supports a Computer MIDI Instrument, which can be used, but this method doesn’t allow any editing before playing the recording.
An iOS device also records audio by default when paired with newer iHome devices; most sound equipment will also have an aux/microphone input that can be used for simple recordings such as these.
A more elaborate option is through apps like Loopy HD or METRONOMIDL’O that allow playback and recording on smartphones and tablets; they offer loops and include drum tracks for various genres of music, as well as allowing layering up to four tracks together.
How to record flute at home
To record the flute at home you will need a microphone, an audio interface, and a computer with recording software to get started.
Place the microphone close to the flute but not too close, as this may cause distortion.
Connect the microphone to the audio interface using an XLR cable, then connect the audio interface to your computer with either USB or Firewire.
Next, open your recording software and select it as the input device.
Finally, adjust your levels, so they are not too low or too high.
Once everything is set up correctly, you can begin recording!
Make sure to take breaks between takes and listen back to ensure you have captured the best sound possible.
How to record bass flute
Recording bass flutes can be a great way to add depth and texture to your music.
To start, you’ll need a microphone and an audio interface compatible with the instrument.
You’ll also need a good set of headphones or monitors to hear what you’re recording clearly.
Once everything is set up, you’ll want to position the microphone close to the bell of the flute, but not too close, as this will cause distortion.
You may also want to experiment with different mic placements and angles to get the best sound possible.
Finally, ensure your levels are properly adjusted before recording and take your time while playing – it’s important to record clean takes without any mistakes.
How to EQ the flute
EQing a flute is an essential step in achieving the best sound possible.
First, use high-pass and low-pass filters to remove unwanted frequencies from the signal.
Then, boost the mid-range frequencies with a bell curve to enhance the instrument’s clarity.
You can also add a slight boost to the high end of the frequency spectrum to help it cut through the mix.
Finally, experiment with subtle boosts or cuts around 2kHz and 4kHz for added clarity and presence.
Don’t forget to check your EQ settings on different speakers or headphones as well – what sounds good on one system may not sound right on another.
How to record flute on garageband
- Launch GarageBand. It should show up as a floating icon in the Dock.
- Swipe to open GarageBand from the Dock, if necessary.
- Double-click on the Recorder instrument near the bottom of this column. In one column titled Track, click and highlight TAPE 1 where it says ADD TRACK TO RECORDER INSTRUMENT;
- Then hit CHOOSE NEW TRACK SETTINGS at the top of your screen and hit OK twice to create a blank soundtrack that you can produce any sound on for this track (you’ll be recording into it).
- Select different instruments and drums and effects to shape your home made music production.
How often should I service a flute?
A flute should be serviced regularly to ensure it is in good working order and produces the best sound possible.
It is recommended that flutes be serviced at least once a year, preferably by a professional technician.
This will help ensure all the pads are sealing properly, the springs are functioning correctly, and all the keys are in good condition.
Additionally, servicing your flute will help prevent any build-up of dirt or debris, which can affect its sound quality.
If you play your flute regularly or take it to gigs or performances, you may want to consider having it serviced more often than once a year.
Doing so will help keep your instrument in top condition and playing its best for years.
Hope that was helpful!
Thanks,
Tom
I’m Tom S. Ray and I’m head mastering engineer at Audio Unity Group. I also hold a bachelor with honours degree in music from Kingston University in London, I lecture mastering to students in Edinburgh College and to my online students via my Mastering Mastery audio mastering online course.

